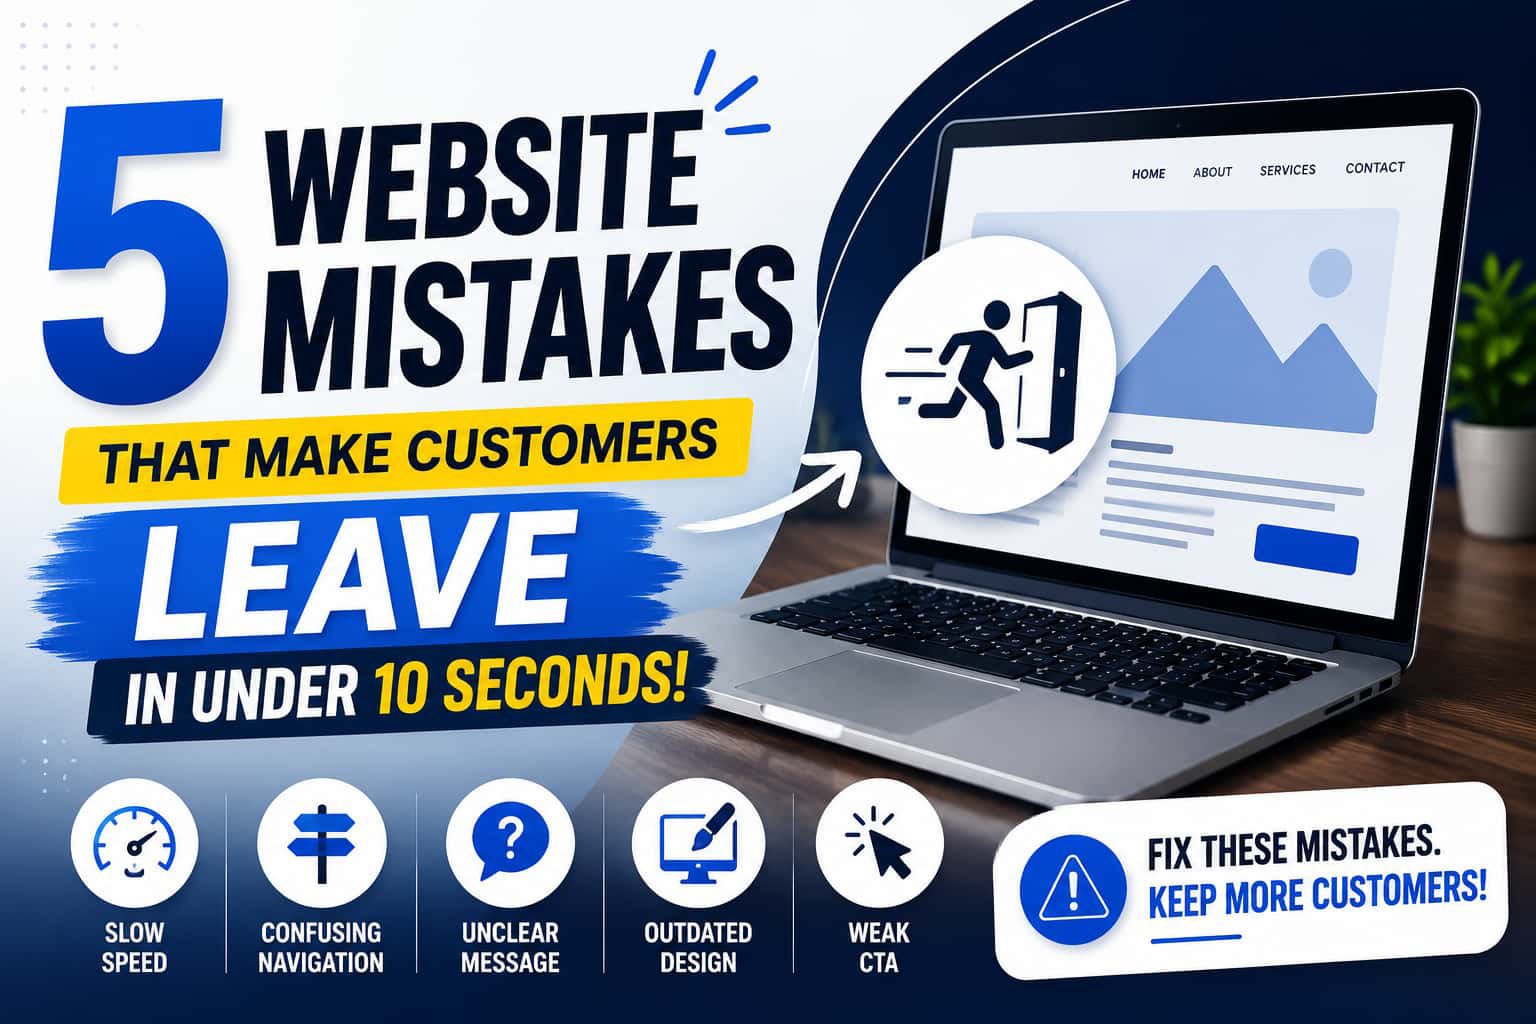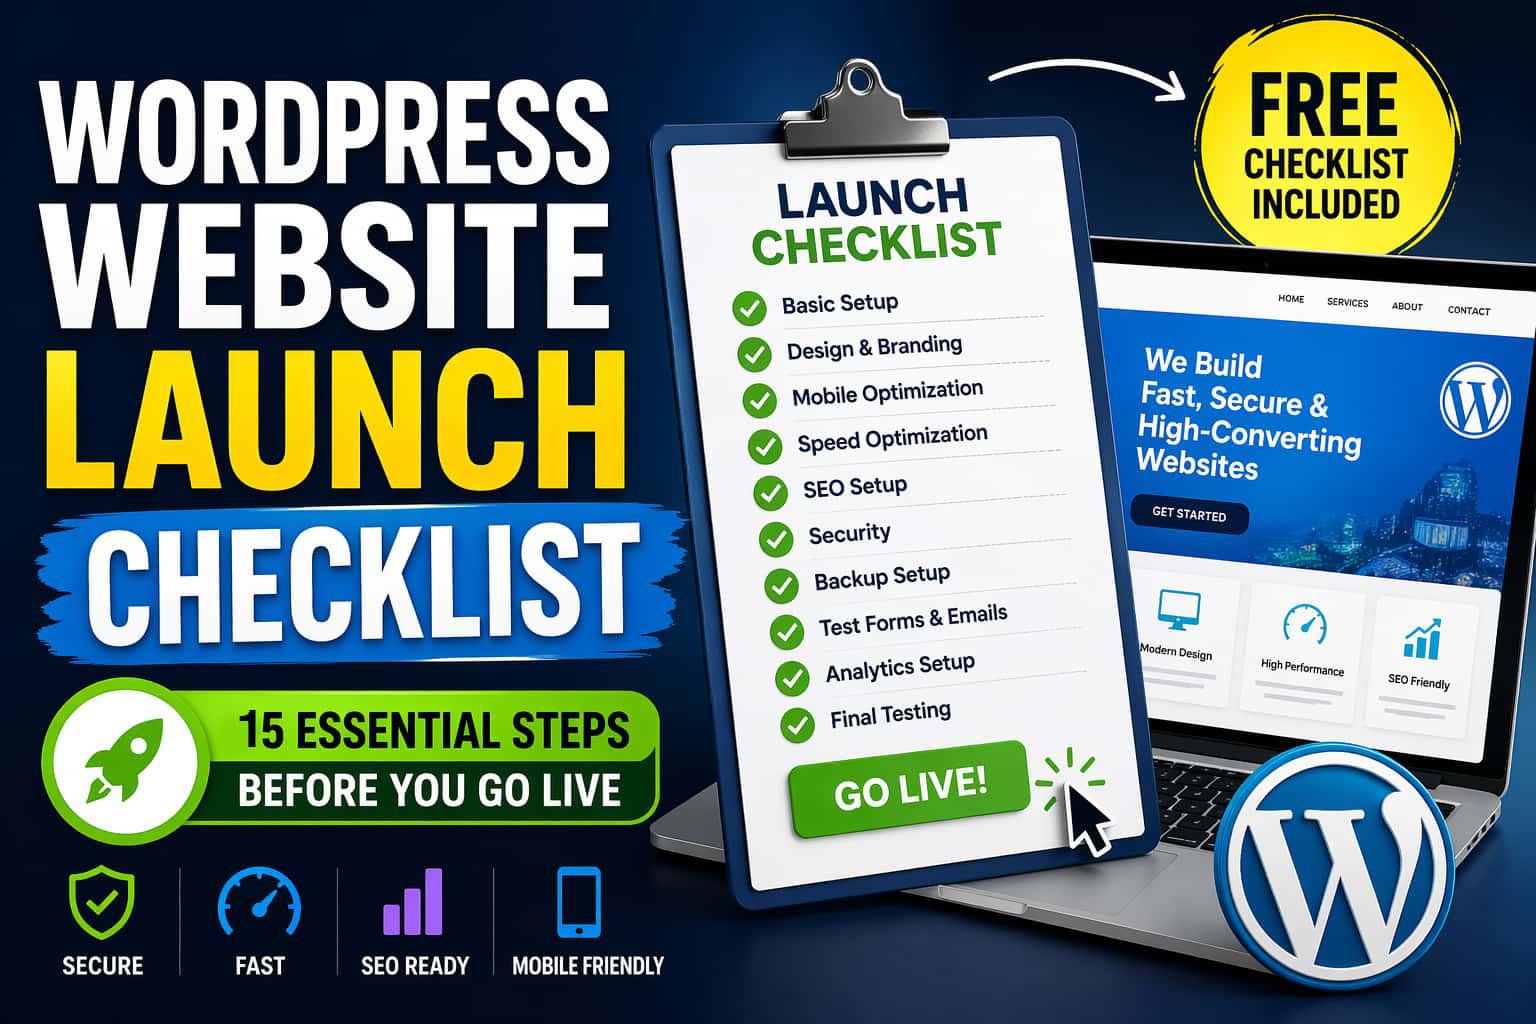
A WordPress website launch checklist helps you avoid mistakes before going live. Without a proper checklist, your site may look good but still fail in performance, SEO, and conversions.
However, most people skip critical steps. As a result, they face slow loading speed, broken links, and poor rankings.
Therefore, using a clear checklist ensures your website is fast, secure, and ready to grow from day one.
✅ Why a WordPress Website Launch Checklist Matters
A checklist keeps everything simple.
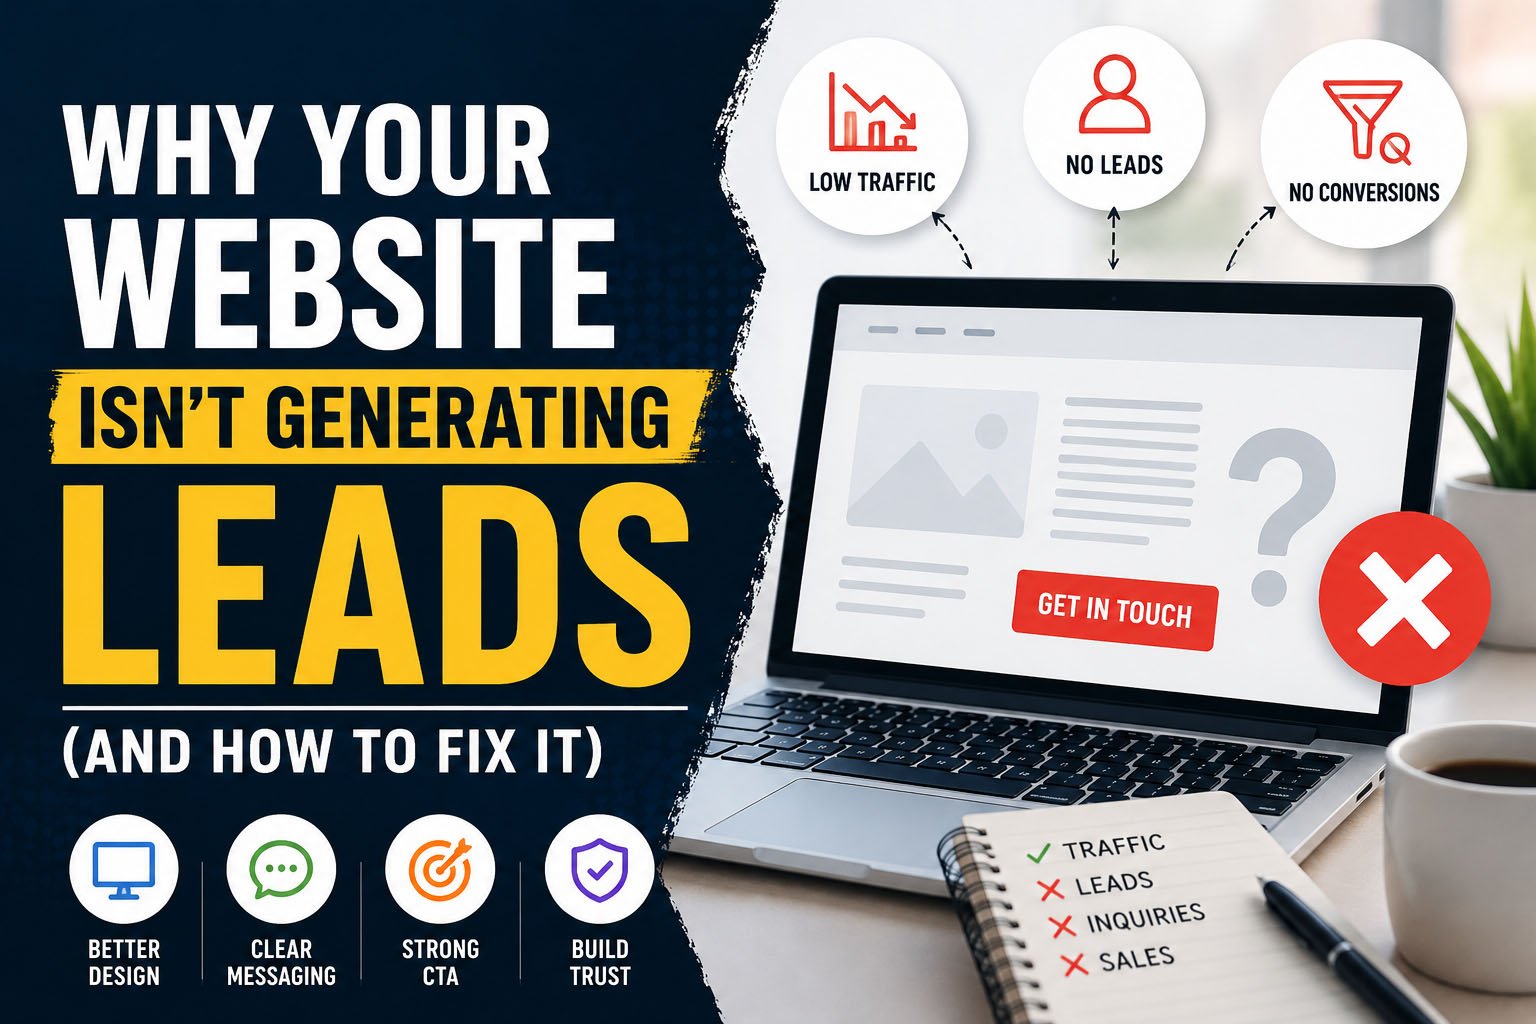
Without it, you may face:
- Slow loading pages
- Broken links
- Poor SEO rankings
- Low conversions
On the other hand, a checklist ensures your site is fully ready.
📋 The Complete WordPress Website Launch Checklist
Now, follow these steps before you go live.
🔧 1. Basic WordPress Settings
First, start with the basics:
- Set site title and tagline
- Check WordPress address (URL)
- Set timezone
- Update permalinks to “Post Name”
- Delete default content
As a result, these small steps build a strong base.
🎨 2. Design and Branding
Next, review your design:
- Add logo and favicon
- Use consistent colors
- Keep fonts readable
- Add clear call-to-action buttons
Therefore, good design builds trust.
📱 3. Mobile Optimization
Most users visit from mobile.
So, you must:
- Test on phone and tablet
- Fix broken layouts
- Check button spacing
As a result, a mobile-friendly site improves SEO.
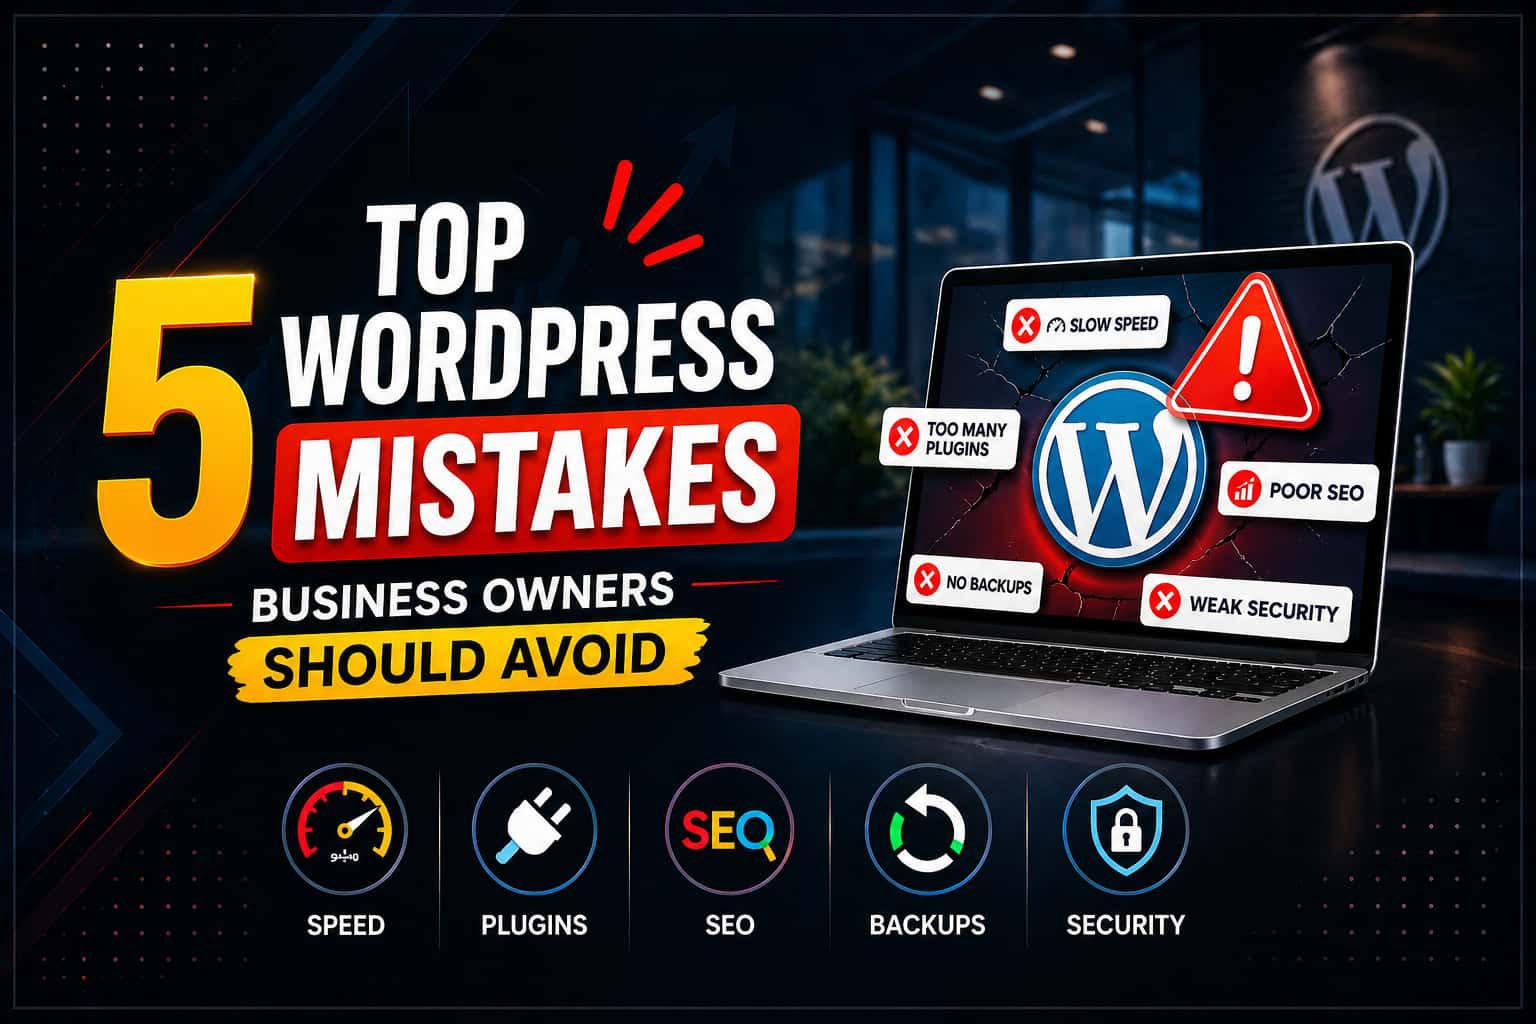
⚡ 4. Website Speed Optimization
Speed is critical. If your site is slow, users will leave quickly.
So, before launch:
- Compress all images
- Enable caching
- Minify CSS and JavaScript
- Use a CDN
In addition, test your speed using reliable tools.
Also, read this guide to improve performance: Why Fast WordPress Website Convert Better (Proven Tips)
🔍 5. SEO Setup (Important)
Now, focus on SEO.
First, install the All in One SEO plugin.
Then, add your focus keyword and optimize your meta tags.
After that:
- Use proper headings (H1, H2, H3)
- Add alt text to all images
- Improve keyword placement naturally
Moreover, you should:
- Create an XML sitemap
- Submit your site to Google Search Console
For best practices, follow: Google Search Central
🔗 6. Fix Links
Next, check all links:
- Internal links should work
- External links should open properly
- No broken links
As a result, this improves both SEO and user experience.
🔐 7. Website Security
Security is not optional. If your site is not secure, users will not trust it.
So, make sure:
- SSL certificate is active
- A security plugin is installed
- Strong passwords are used
Additionally, change the default login URL to reduce attacks.
💾 8. Backup Setup
Always prepare for the worst.
- Enable automatic backups
- Store backups in cloud storage
So, you can recover your site anytime.
📧 9. Test Forms and Emails
Do not skip this step.
- Test contact forms
- Check email delivery
- Confirm autoresponders
Otherwise, you may lose leads.
🛒 10. Functionality Testing
Next, test everything:
- Buttons
- Navigation menus
- Checkout process (if eCommerce)
- Login/signup system
As a result, everything will work smoothly.
📊 11. Analytics Setup
Tracking is essential.
- Install Google Analytics
- Connect Google Search Console
- Set up conversion tracking
Therefore, this helps you improve over time.
📄 12. Legal Pages
Also, add important pages:
- Privacy Policy
- Terms and Conditions
- Cookie Policy
As a result, this builds trust and ensures compliance.
✍️ 13. Content Review
Now, review your content carefully.
First, fix grammar mistakes.
Then, shorten long sentences.
In addition, use transition words to improve flow.
For example, words like however, therefore, and finally help readability.
As a result, your content becomes easier to read and score higher in SEO tools.
🚫 14. Disable No-Index
Before launch:
- Turn off “Discourage search engines”
Otherwise, your site will not appear on Google.
🌐 15. Final Testing
Finally, test everything before launch.
- Check all pages
- Test loading speed again
- Review mobile responsiveness
After that, do a full walkthrough of your site.
Once everything looks good, you can safely go live.
🎯 Pro Tips for Better Results
- Launch during low traffic time
- Monitor errors after launch
- Keep improving your site
🏁 Conclusion
Launching a site is not just clicking publish.
You need a proper plan.
This WordPress website launch checklist helps you avoid mistakes. It also ensures your website is ready for users and search engines.
So, follow every step carefully.
And finally, launch your site with confidence.